How to Record iTunes Radio Stations onto your iPod
Wouldn't it be cool if you could listen to the radio on your iPod --
from those wonderful iTunes radio stations? Well, you can! Not only
that, you'll be able to see what song is playing, skip to the next song
if you don't like it, or replay a song you like.
Using Replay A/V from
Applian Technologies, you can simply drag and drop station from iTunes
Radio into Replay A/V for recording.Once recording has finished,
you'll have separate MP3 files for each song!
How to record iTunes radio stations onto your iPod:
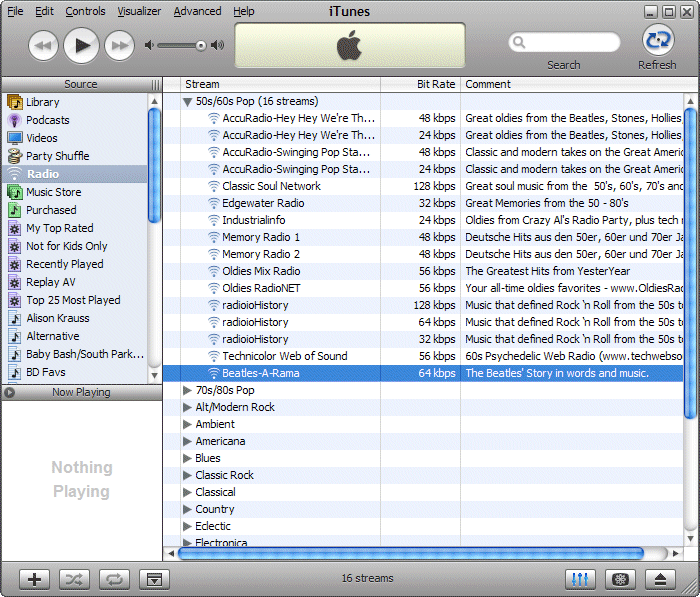
- Open iTunes, and click the Radio tab. The Radio Stations list appears
as shown:

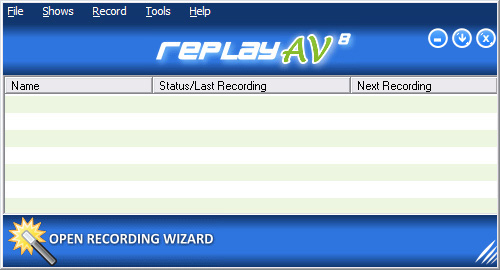
- Open Replay A/V. It appears like this:

- In this example, we'll add Beatles-A-Rama to Replay A/V to record.
Simply drag the radio station over the Replay A/V main window, and
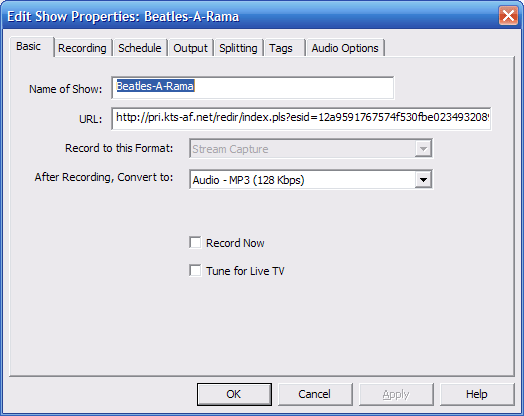
release the mouse button. In Replay A/V, the station appears ready
to record as follows:

- To have songs added automatically to iTunes, choose Audio
- MP3 for the After Recording, Convert to option.
Then click
the Output
tab, and tick Add to iTunes.
- To begin recording right away, from the Basic tab click Record
Now. You can also schedule a time and duration for recording
from the Schedule tab. This is handy if you want to automatically
get fresh new songs onto your iPod once a day or every week.
- Click OK when you're done.
One of the cool things about recording iTunes (and other Shoutcast-style
stations) is that Replay A/V will automatically create a new MP3 file
whenever a song changes. In addition, it will tag the MP3 files with
the artist and song title, so you can see what song is playing while
you listen. If you set up a playlist in iTunes, you'll be able to
skip over songs you don't like, or replay songs you enjoy. Of course,
this works on your iPod, too! There's never been a better way to listen
to the radio.
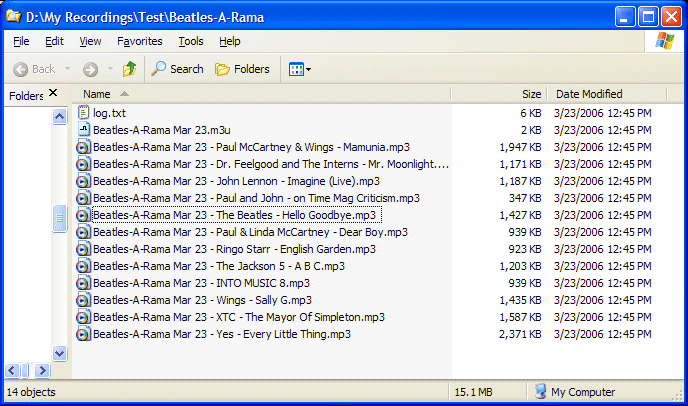
Here's what our Beatles-a-Rama recording session produced:

Now it's your turn. Give Replay A/V a try!

Click here to learn more about recording iTunes radio with Replay A/V
|

